Uploading Files for Updating an Existing Catalog Item or Creating a New One
Mass Uploading/Updating of Catalog Items
You can use mass uploading to create new catalog items or update existing ones.
Uploading Content Components
1. Before uploading multiple files to a catalog, you need to prepare and upload into Storage the following files:
Cover;
Image for preview;
Content files.
2. For more information about uploading files into Storage, please see the Storage section of this manual.
3. You can skip this step if:
You intend to use files located at other online resources. When filling out the mass upload template, you will need to enter links to such other resources;
You intend to upload your files manually.
Uploading Files for Updating an Existing Catalog Item or Creating a New One
The following types of files may be uploaded automatically:
CSV (Excel tables using the comma as a separator);
ONIX 2.0 or 3.0 short.
We recommend that you use a template to prepare .csv files.
Mass Uploading/Updating of Catalog Items
1. Go to the “Content Management” section in the “Catalog” tab (red arrow on Exhibit 1).

Exhibit 1
2. Click on the “Mass Upload” button (green arrow on Exhibit 1).
3. The Mass Upload window will open so that you could upload the file you have prepared.
3.1. If you don’t have a file ready, you will need to prepare it first. To do that, click on the “Use Step-by-Step Instructions” (purple arrow on Exhibit 2).

Exhibit 2
3.2. In the window that opens, click on “Download Template” (green arrow on Exhibit 3).
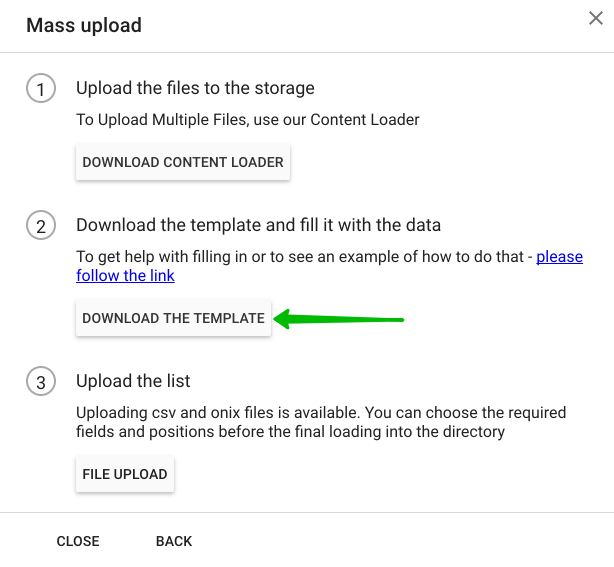
Exhibit 3
3.3. Exhibit 4 below shows how data is entered into a template.

Exhibit 4
3.4. When filling out a template, please adhere to the following rules:
3.4.1. If the “Fields and Values” table (paragraph 3.5. of these instructions) contains allowed values, you can only use such values;
3.4.2. When entering more than one value, separate them with a comma;
3.4.3. To add an extra field to describe an item, add a column to the template and enter its header and values as appropriate;
3.4.4. Entries are case-sensitive (if you add an ISBN in all caps and enter values, and then enter the isbn in lowercase in a different template, they will be two different fields);
3.4.5. When filling out a template, make sure that what shows on the top line in Excel is what you entered into the cell. Exhibit 5 below gives an example of an entry made incorrectly.
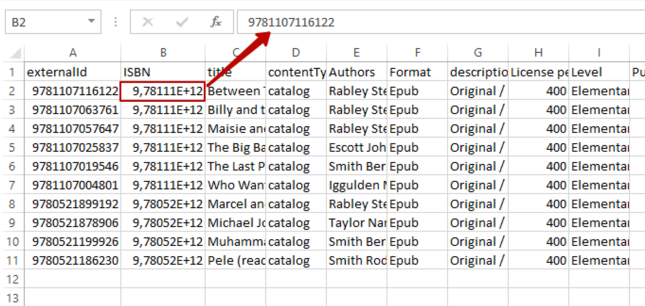
Exhibit 5
3.4.6. To change the way numeric data is displayed, you need to select a cell range and format them to show the numbers correctly (Exhibit 6).

Exhibit 6
3.4.7. Once all the data is entered, save the file in the CSV (MS-DOS) format (Exhibit 7). Saving as a different format may cause data to be displayed incorrectly.
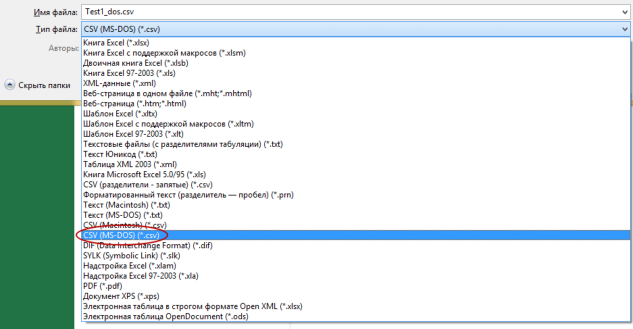
Exhibit 7
3.5. Table 1 lists template fields and their allowed values:
Column name | Description | Allowed values |
Title | Catalog item name | Text field. Enter all the information as you see fit. It will show in the catalog exactly as entered. |
description | Catalog item description | Text field. Enter all the information as you see fit. It will show in the catalog exactly as entered. |
contentType | Catalog item type | All entries must be in lower case. Select one of the following options available and enter it exactly as shown: catalog or book (for Book files) video (for video files) licenseCode (for access codes) software (for software) |
instruction | User instructions | Text field. Enter all the information as you see fit. It will show in the catalog exactly as entered. |
platformSupport | Operating systems supported. Used only for Book files | Select one of the following options available and enter it exactly as shown: macosx android ios windows |
catalog.cover.fileName | Cover image | Text field. Enter the full name of the cover file uploaded into Storage or a link to download such a file if it is located at an online storage elsewhere. |
previewImages | List of images for preview | Text field. Enter the full name of the file for preview if it has been uploaded into Storage or a link to the third-party online resource where it is located. When entering more than one file name, separate them with a semi-colon (;) ONLY. |
storage.fileName | File corresponding to this item | Text field. Enter the full name of the file if it has been uploaded into Storage or a link to the third-party online resource where it is located. |
contentUrl | Link to content. Only used for Software and Video. | Text field. Enter the link. |
externalId | The catalog item’s unique identifier that will be used to update catalog items and add the products created to the Product List. | Text field for entering the unique identifier. To allow for subsequent updating of catalog items, fill out the “externalId” field for every line to be used as an identifier during such updating. For example, you can use the appropriate ISBN for this, or any other identifier of your choosing. IMPORTANT! Please make sure that you enter such identifiers in the correct field marked as externalId. |
3.6. Table 2 lists the required fields for different types of content:
Content type | Required fields |
Book (“catalog” or “book”) | - Title - contentType - ISBN - externalId |
Video (“video”) | - Title - contentType - externalId |
Software (“software”) | - Title - contentType - externalId |
Access code (“licenseCode”) | - Title - contentType - externalId |
4. To upload a ready file, click on “Upload File” (blue arrow on Exhibit 8) and select the file on your device.
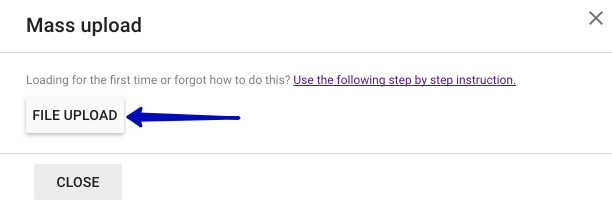
Exhibit 8
5. Once the file is uploaded, a preview of the data uploaded will open (Exhibit 9). Use it to verify that all the field values have been entered correctly and identify any errors. You can then either cancel the upload and go back to correct the errors thus identified or save the file and add the items to the Catalog.

Exhibit 9
5.1. We recommend that you check the status of every item, as indicated below:
- “New” means that this is a new item to be added to the catalog (blue arrow on Exhibit 10);
- “Updated” means that this is a previously existing catalog item to which changes will be made (green arrow on Exhibit 10).
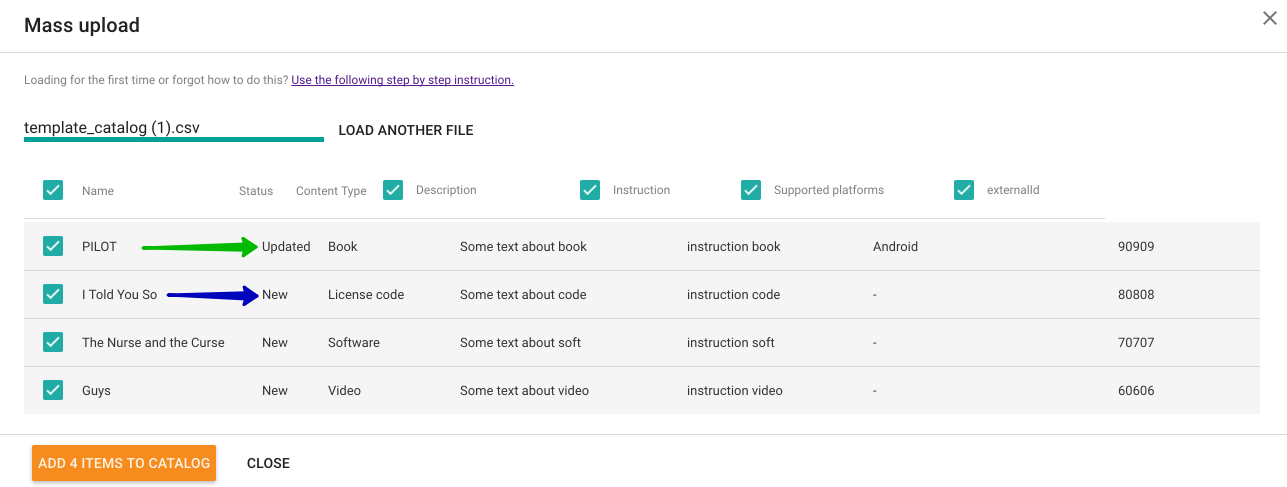
Exhibit 10
5.2. If you do not want to add or update some of the data from the list to be uploaded to/in the catalog, uncheck the appropriate column names marked with blues arrows on Exhibit 11 below. We do not recommend unchecking required fields since this may cause errors.
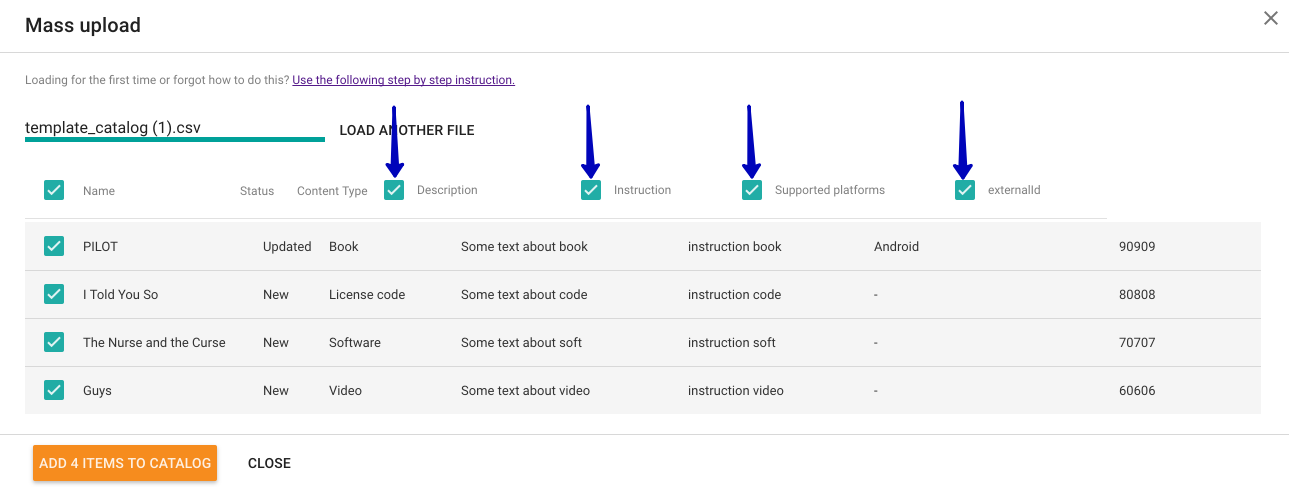
Exhibit 11
5.3. If the list to be uploaded contains items you do not want to upload or update, uncheck any such items as shown on Exhibit 12 (red arrows on the left).

Exhibit 12
5.4. If the preview mode shows an error in one or more fields (blue arrow on Exhibit 13), check the file to be loaded against Table 1 to see if everything was entered correctly.
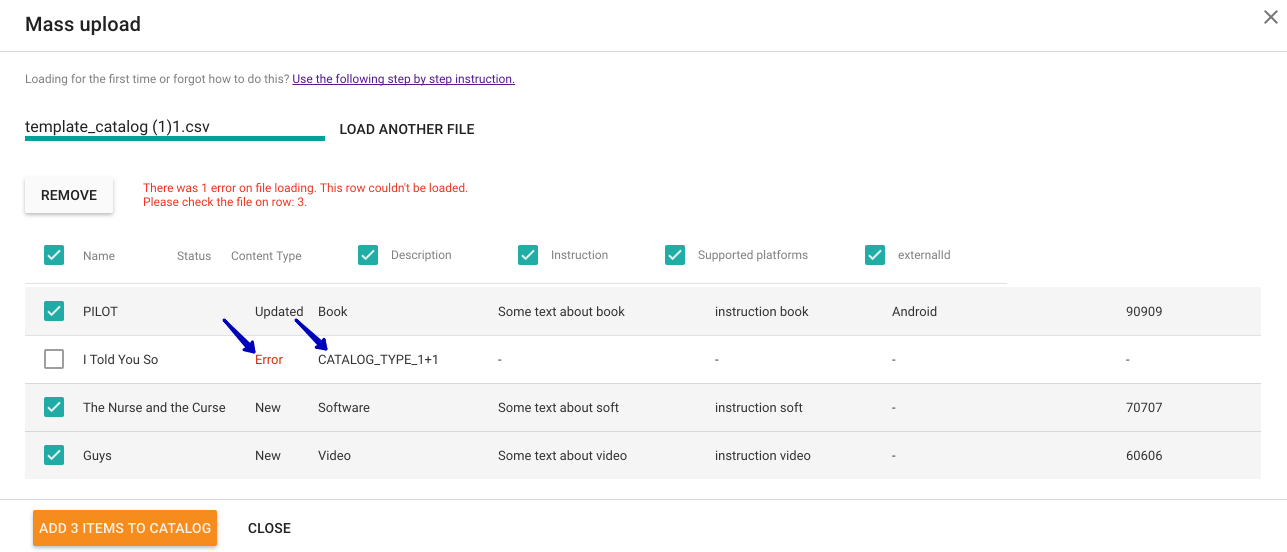
Exhibit 13
5.5. If one or more items display errors (red arrow on Exhibit 14) even though all the cells in the template appear to have been filled as shown in Table 1, we recommend that you check to make sure that all the required fields (title, contentType, externalId) are there and have been filled out correctly.


Exhibit 14
5.6. If, when adding new items, all of them display errors (Exhibit 15) even though all the cells in the template appear to have been filled as shown in Table 1, we recommend that you check to make sure the required fields column is there: title, contentType, externalId. You cannot add a new item without entering an appropriate value for all of those.

Exhibit 15