Connecting to an External Storage
Files removement from the Storage
Aggregion offers an internal storage for all the uploaded files. If an individual account has one or more subaccounts, each of them will have its own, independent storage separate from that of the other subaccounts.
You can also establish a link to an external storage, such as Microsoft Azure, or the publisher's own storage where its content is maintained.
Aggregion's Internal Storage
1. To enter the storage, click on the "Content management" tab in the main menu on the left (blue arrow on Exhibit 1).
2. Click on the "Storage" button in the "Content management" window (green arrow on Exhibit 1).

Exhibit 1
3. To select an account and access its storage, press the button marked with a purple arrow on Exhibit 1.
4. Originally, the storage is empty. To add a file to the storage, click on the "Add file" button (red arrow on Exhibit 1).
5. In the window that opens, click on the "File Upload" button (red arrow on Exhibit 2 below) and select the file you want to upload from your device. You can close the window by clicking on the "Cancel" button (green arrow on Exhibit 2).
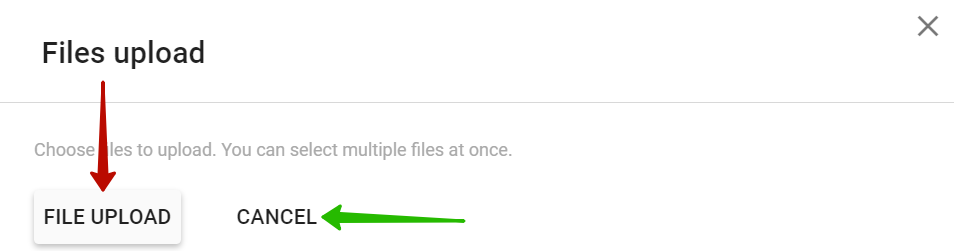
Exhibit 2
6. Select a file and click on the "Open" button (red arrow on Exhibit 3 below).

Exhibit 3
7. If you need to upload more than one file, click on the "Upload More Files" button (blue arrow on Exhibit 5 below). Repeat Steps 5 and 6.

Exhibit 4
8. To give click-through access to the file to other users and to authorize the item to be displayed in your online store, check the "Shared by link" box (green arrow on Exhibit 4). You can perform this operation later using the same box.
9. Click on the "Save" button (red arrow on Exhibit 4).
10. To close the window without saving, click on the "Cancel & don't upload" button (purple arrow on Exhibit 4).
11. All the files you saved will be displayed in the storage.
Connecting to an External Storage
1. To connect to an external storage, click on the "Storage Settings" button in the "Storage" tab (black arrow on Exhibit 1).
2. In the window that opens, select the storage desired by clicking on it with the left button of your mouse.

Exhibit 5
3. Enter the MS Azure account information and click on the "Switch to MS Azure Storage" button (red arrow on Exhibit 5). All of the fields are required.
4. To cancel the switch to an external storage, click on the "Close" button (blue arrow on Exhibit 5).
Files removement from the Storage
1. To remove one or several files from the storage, select these files using the "Select" button (purple arrow on Exhibit 6) and click on the "Remove" button (green arrow on Exhibit 6). The "Remove" button will show the number of the files selected in brackets.

Exhibit 6
2. Attention! File deleted from the storage cannot be recovered!